Building continues...
Today, i did the fuselage. First part of the day is cutting the curve shape support, i trace it out from the plan and cut it out. This process is repeated till the last one. I used HobbyKing foam-safe CA(BSI) and Mercury Accelerator, clean and quick job. After doing so, the shape of F16 is almost out, as u can see.
I cut out 2 different length of foam, 2 length each. These are for the sides, up and bottom, to support the cardboard when i bend it to shape, u will see the results later. This is also a simple task, took me 10mins or so.

Okay finish with the structure of the fuselage. Now its time to cut out the cover for the fuselage. What they recommend me is 3mm depron foam, but i couldnt find it from Art Friend, so no choice, i chose cardboard instead. Firstly i cut out the shape of the cover, and i cut the shape out by placing the plan on top of the cardboard is cut it by the outline. There are 4 parts for the fuselages, cut out 4 parts and had cut out some for spare, just in case i destroy the another one. kekeke.. For today, i only glued the bottom covering to the fuselage, as i am waiting for my electronics to be shipped to me from HobbyCity. I will place all my electronics on top. I will need to buy some carbon rods, both hollow and solid for the elevator session and some reinforcement.


Look at the mess i done to my balcony. LoL!

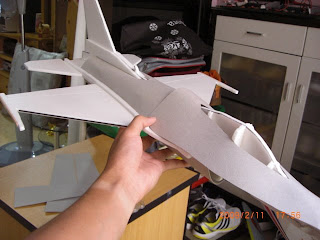
A test fit of the upper layer. Damn it beautiful! Cant wait to glue the coverings on and paint it.

 -*Louis


